This is my 4th time of PC Build. This succeeds from 3rd gen Sandy-Bridge build since 2010, I assembled it just myself with holding a video camera for capturing my process. I've some old parts came from the last build it was a Western Digital 500GB Hard Drive - the 3rd Build system...Some modifications that I've pretty excitement. Those are 2 Corsair fans; 1pc of SP120 (120mm fan) and 1pc of Corsair AF140 (140mm fan) w/c I decided to paint them with white gloss. The AF140 had dents because I accidentally dropped both SP120 and the af140 to the ground It's just shaken. These case fans from Corsair are brittleness unlike to other brands are tensile. and Also I sprayed the Seasonic full modular PSU, including the 120mm fan inside. I'm not risking my PSU tho, It's perfectly fine. I just wanna show the full white theme. The Corsair Vengeance sticks 4x4 16gb total - I painted these too. And I've sticker sabranco with very much identical contrast to sabranco Asus as the replacement on the heatsinks.
SPECS
- CPU: Intel Core i7 4790K 4.4Ghz
- MotherBoard: Asus Sabertooth Z97 Mark S Limited Edition
- Cooler: Swiftech H220X custom white themed
- RAM: Corsair Vengeance 4x4 8gb Kit 1866Mhz CL9 custom sabranco themed
- SSD: Intel 530 Series 128gb
- HDD: Seagate Barracuda 500gb 7200RPM Main Storage Storage
- HDD: Western Digital Black 80gb 7200RPM 2nd Storage
- CASE: NZXT H440 White
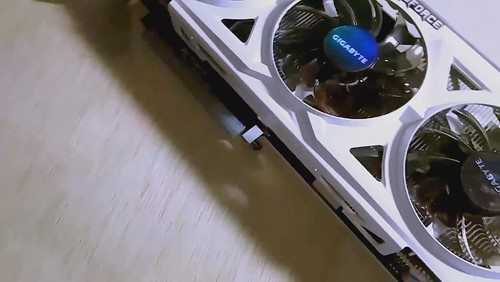
- GPU: Gigabyte NVidia Geforce GTX 760 2GB Windforce 3x OC custom milk themed
- PSU: Seasonic M12II Evo Full Modular 80Plus Bronze Certified
From the left; my next build: Lilly and from the right; That is Helena.
After benchmarking, not just the bench, We installed the drivers before to assemble.
Unplugging all cables, bring all the parts onto your near where you supposed to do the assembly.
taking the side panels off then,
Put the side panels in the box,
Next, move to my Motherboard. the Asus Sabertooth Z97 Mark S Limited Edition, so let's get it out of the box.
Install the necessary things such as PCI\ caps, 2 small fans ( I only installed the exhaust fan from the input/out ports. Don't forget to install the thermal sensor for being monitor the heat of the motherboard.
Install the four sticks (16gb) of ram to correct slots.
Next, time to screwing the motherboard in the case.
Take out the NZXT stock fan, and replace it with your Corsair AF140 fan.
Once It's done, install it as a rear exhaust.
Next, remove the stock Intel cooler
Next, get the Swiftech H220X CPU liquid cooler.
Clean the used thermal paste with alcohol.
Next, get the Swiftech H220X CPU liquid cooler.
Then, remove the top panel for the cooler.
put the top and front panels back in the box,
Unscrew the two 120mm fans from the radiator.
Screw the fans with the long screws to the fans and radiator.
add the thermal paste on the CPU.
Attach the H220X CPU bracket behind of the motherboard.
Don't forget to remove the plastic cover from the CPU block.
Take out the two hard drives brackets, and install them.
Unscrew the SSD bracket from the bottom of the case.
Aside from that, don't ever forget to grab the front panel adapter came from the Asus motherboard. and connect the hard drive LED, power switch, reset switch and the power LED.
Connect the SATA cable to sata6gb for your boot drive.
Connect the HD Audio from the left.
Connect the SATA to the hard drives.
Connect the USB 3.0.
Connect the fan to the fan header (conclusion: if your fan has only 3-pin connector. don't worry they'll work well to 4pin header.)
Later, slide the SSD forward, and screw it.
Then, connect the SATA again to SSD and to motherboard
Connect the CPU power connector and the 24pin ATX power connector.
Connect everything necessary to the Seasonic PSU.
If you want fancy cables, grab extensions from Bitfenix. I used all Alchemies kits.
When you're stressed , those cables' pissed you. Tie them in as you can, Grab some cable ties (I will not recommend using zip ties especially if something happened on your machine)
Next, if you want brightness, install then NZXT Hue 5.25" RGB controller, into the side of the case w/c I've decided to mount on the hard drive cages.
Unscrew, and take the 2-3 PCI slots out.
Take the GTX 760.
Insert the graphics card into the motherboard.
Secure the GTX 760 to the case with the provided screws.
And plug the 6x8 pin power cable into the graphics card.
Put all the panels back on the case.
Then, screw the side panels in.
And there you have it. My dearest "Helena".